Tuesday, July 30, 2013

It's not so hot anymore, which is a welcome relief as my deadline is drawing near.  I have little under ten days left to get this thing functional.

In the meantime I did get a chance to spend many hot hours at the RMV and driving about to get the trailer registered, so at least its legal now (or at least will be once I get the lights, reflectors and license plate installed).

Meanwhile I have been focusing on the important things, like: waterproofing the front and back doors, and getting someplace to sleep.


Installing the handles on the front door was very challenging, and I'm not 100% satisfied that its sturdy enough to warrant being called 'done'.  These kinds of doors have lots of moving parts, so to speak, and lots of seams compared to a simple one-piece door.  I will need to make a simpler door in the future.

Most of the outside stuff is done now.  I am working on fixing the tarpaulin into place, and making wooden trim to cover its edges.  The remaining work after this is all inside: cabinet doors and the pull-out table.  Interior lights.  Then we can do things like paint trim and decoration, and hang curtains, make pillows etc.

Tuesday, July 2, 2013

Diversion


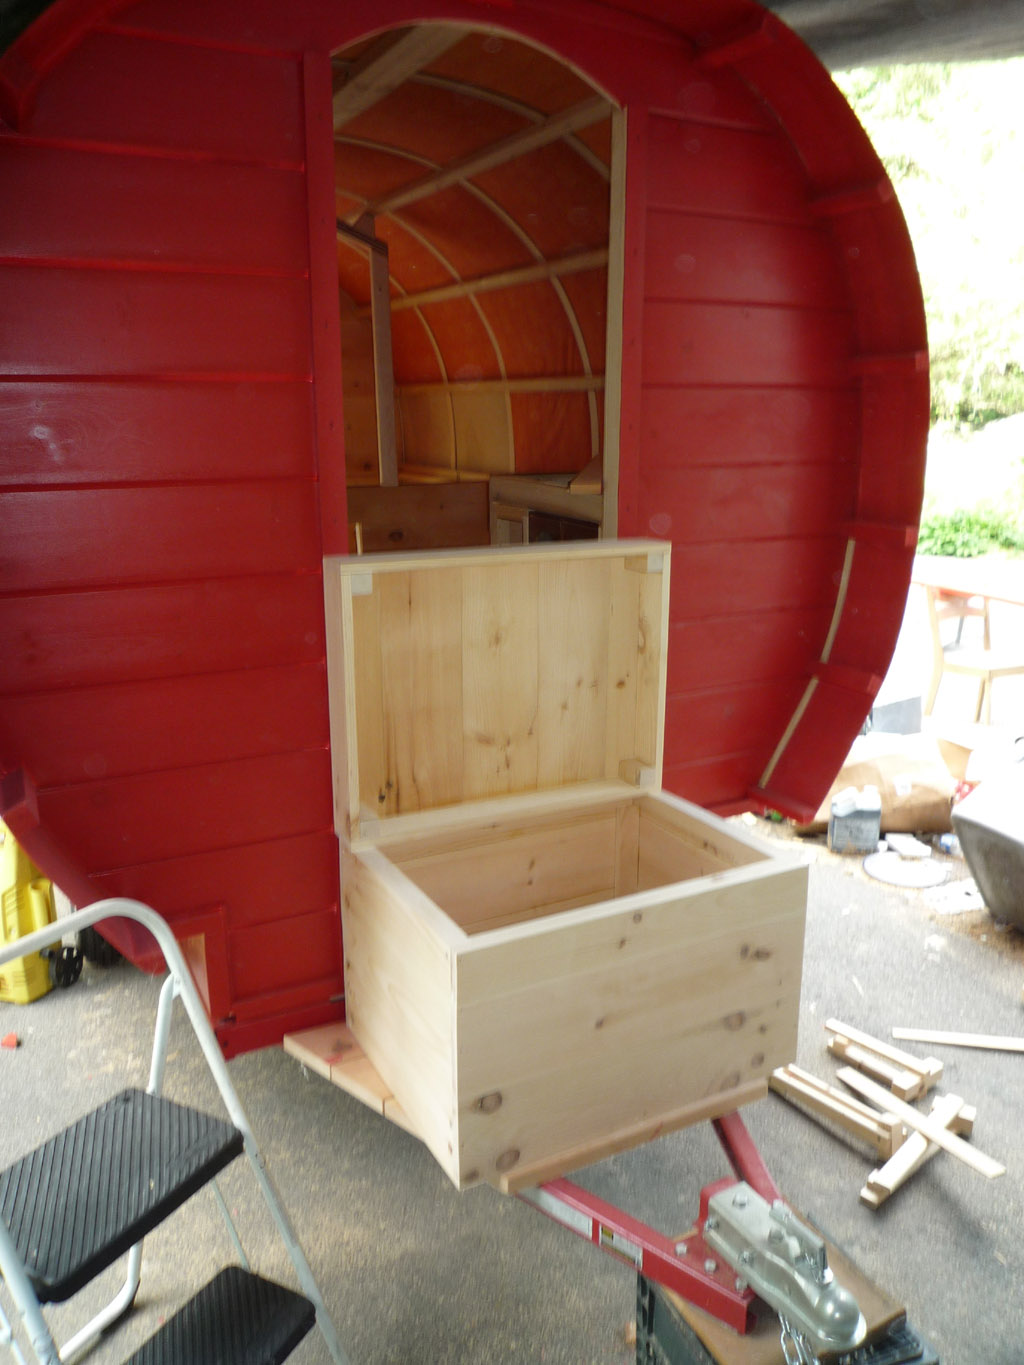
I am building a 'seachest' that'll live at the front of the vardo, on the steps.  It's designed to be a general storage box, and additionally a way for me to add tongue weight to the trailer to help balance the whole thing while traveling.  It's made predominately with scrap wood, the same ship-lapped single-faced wood I made the front and back walls with, as well as the floorboards.

It's a simple design, a slender internal frame holds the wood panels in place.  Each piece is epoxy glued to the frame as well as its partners.
 

I switched to using nails after the initial row.  Nails are sufficient to hold it together, and with long clamps I don't need the pulling power of a screw to lock things into place.


Here is the chest in its place


After staining it with a wood stain (so old it was the consistency of peanut butter) I started working on the edge trim.  I am edging the chest with 2" strips of aged copper I am cutting from an old shower drain pan that was lying around.


Dressing and distressing the chest is going to be fun. I am planning on aged leather handles on either side, copper hinge and latch hardware, aged with ammonia fumes and vinegar. Lastly I'll construct some tool-chest inserts and compartments to hold certain specific items.  It will require a waterproof seal (probably a rubber compression gasket) and a lockable latch.

I am also planning on installing some very short feet to protect it from moisture, as it will need to be removed from the Vardo steps and placed on the ground at camp.

There is something special about making boxes.  They can be so simple.  Carpenters cut their teeth on boxes and yet they remain one of the more common go-to's to illustrate a craftsman's skill.  Additionally a sea-chest is not just a box, it's the container of, and safety net for, a traveler's material life - it's integrity is paramount..


Step 16: more detail work


I spent some time sealing the front face with paintable silicone.  It works pretty well, except it's white, and will take quite a few coats to make it as red as the rest of the wood:


The cabinets also got fancy, new, dovetailed trim:


Lastly, but most importantly, I fixed the air-conditioner situation in the garage.  Yes, my workshop has an air conditioner and I finally broke down and started using it.  I had been experimenting with a gluten free version of an open source soylent, balanced food supplement (basically a super protein shake).  Didn't go so well, and I felt like shit for the last couple of days.  Slowed me down bigtime.

Tuesday, June 25, 2013

Step 15: Trim, trim, trim, trim, trim....

God it never ends.

Finish-work.

I got a new airbrush - loving it so far.  Tried out some stencils I picked up from AC Moore to see how it will all come together.  Don't worry the panel hasn't finished being painted red yet, the stenciling will end up symmetrical and AWESOME.

Honestly I'm looking forward to the artwork side of this.  The main project build has been engrossing, but hard work - more engineering that artistry.

Also the interior needs a lot more finish-work, but all in good time. :D

This pic shows a mock up of the bedroom arch (which should have been installed before the exterior cover).

These 10' long paneled boards (that I'm calling waist-boards) will run alongside and above the base of the caravan, and sandwich the end of the tarp neatly to the side of the caravan.  It's also a way of increasing the visible sideboard, making it appear considerably more aesthetically appealing from the side. 


Step 14: Floors and more paint

Floors got some varnish, which helped stop marking them up every-time I was up and down installing something.

More paint got laid down - I switched to the spray-gun for cutting in and just a small 6" foam roller for the face panels.  It goes on quick.

Then I set about waterproofing the front face.  This face is especially important to waterproof as it's facing into the wind when being towed at 65 miles an hour in a rainstorm.  The front edge will catch all that rain and wind and, at that speed, it's like directly pressure-washing the front. 

Waterproofing the front doors is going to suck.


Step 13: Insulation

I moved a bit quick here and installed the fabric sooner than I should have.  It's probably not going to be worth a redo - but time will tell.

Over the fabric I installed some reflective bubblewrap, three layers in fact!  It helps.  It's also quite pricey.  I bought too much, and just used it all instead of returning some.  A single layer is really all that is needed.

Next time (haha) I think it would be better to cut the insulation to size, and contact glue the fabric to it, installing it all in one go.  As is the fabric sags slightly in each panel.  It's not a problem but it still bothers me!